Table of Contents
Introduction
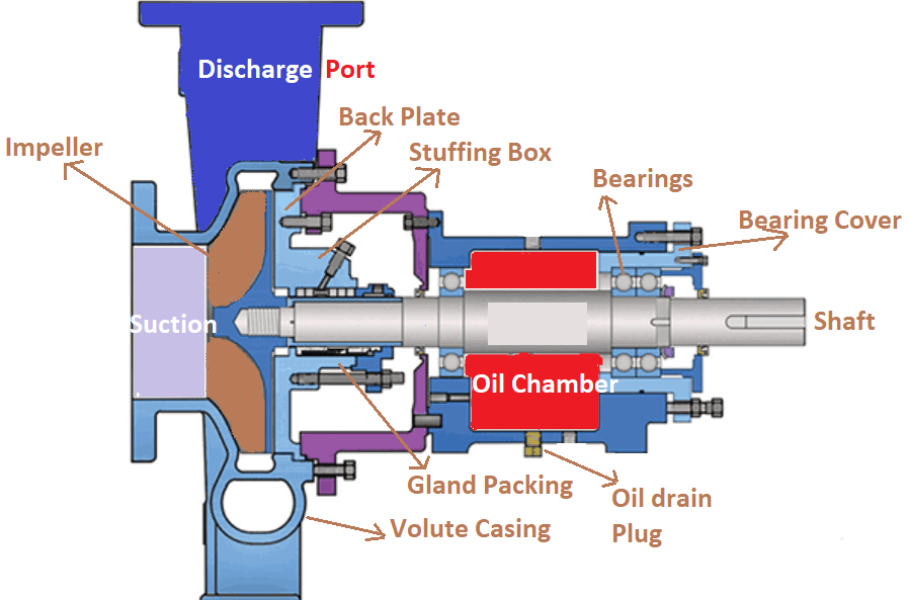
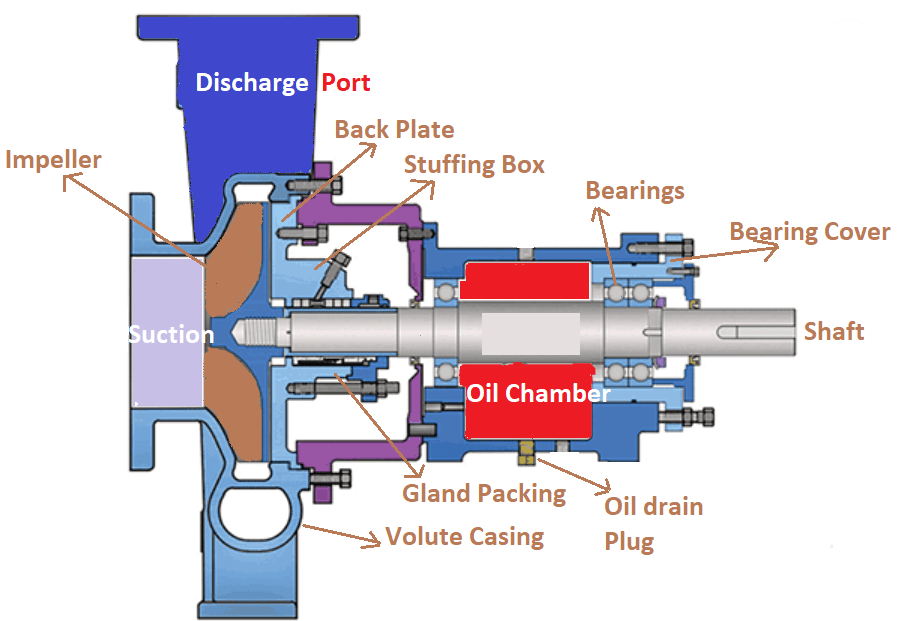
Detailed assembling and disassembling procedures with maintenance steps of a back pull-out type centrifugal pump equipped with internal mechanical seal which is most commonly used in process industries are discussed below. The figure-1 represents a sectional view of a typical back pull-out type centrifugal pump. Back pullout type pumps are widely preferred in industries due to their less assembling and disassembling time during maintenance.
Step by Step Maintenance Procedure for Disassembling a Centrifugal Pump
Electrical Isolation of Centrifugal Pump
- Ensure the power supply of the motor is off in the main panel. Tag “Men at Work” on the switch.
- Turn on the emergency push button in the starter panel at the field.
Disassembling a Centrifugal Pump
- Decouple the pump from the motor by removing the coupling and safeguard the coupling spider.
- Remove the connection of the mechanical seal’s coolant line from the gland plate.
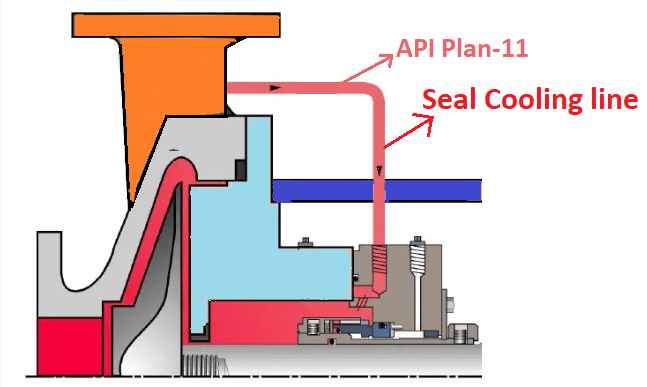
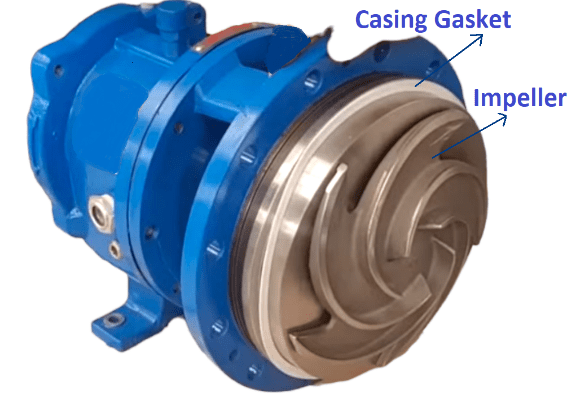
- Unscrew the casing bolts and remove the pump by using the jack bolts fastened to the casing (For a back pull-out type pump).
- Inspect the condition of the casing gasket.
- Use an empty tray aside to keep the removed parts safely.
- Drain the oil completely from the bearing chamber. Inspect the oil for color changes and the presence of foreign/metal particles to ensure bearing condition. Sometimes the particles may form due to the chemical oxidation of the oil.
- Unscrew the impeller nut and remove the impeller. Inspect the impeller for any wear and tear. Inspect impeller nut gasket.
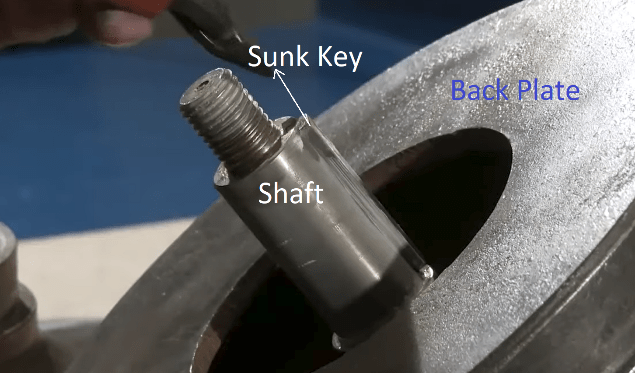
- Remove the sunk key from the shaft.
- Unscrew the gland plate nuts.
- Remove the backplate along with the stuffing box.
- Remove the shaft sleeve along with the rotary part of the mechanical seal (for internal mechanical seal-type pumps)
- Mark the axial position of the rotary part of the mechanical seal on the sleeve and then remove the rotary part from the sleeve.
- Inspect the surface condition of the mating seal faces for wear, sleeve surface for scratches, condition of secondary seal, gland plate gasket and spring /bellow tension.
- Rotate the shaft and observe for abnormal noise and check whether the shaft is having an axial play. If so, remove the bearings and go for replacement based on observation.
Step by Step Maintenance Procedure for Assembling a Centrifugal Pump
Assembling a Centrifugal Pump
- Before assembling ensure that all the components are clean and free from dirt.
- Insert the gland plate on the shaft.
- Precisely position the rotary part of the mechanical seal on the sleeve based on previous markings or from seal drawing and lock its position on the sleeve by tightening the grub screws.
- Install the shaft sleeve along with the rotary part of the mechanical seal on the shaft.
- Install the back plate along with the stuffing box.
- Tighten the gland plate to the stuffing box.
- Install the impeller and tighten the impeller nut.
- Install the pump to the casing.
- Connect the seal coolant’s line to the gland plate.
- Ensure no components were left over in the tray.
- Perform alignment of pump & motor shafts using dial indicators concerning (ANSI/ASA) standard S2.75-2017.
Trial Run of Centrifugal Pump
- Ensure the power supply to the motor and switch it on.
- Measure the vibration of the pump & motor and ensure the readings are within the limits as per ISO 10816 Part-7 standards.
